Have you ever gotten yourself turned around while out hiking and not known exactly where you were and which direction to head?
Maybe you’ve even been totally lost.
I certainly have…
Confidence gets the best of you and you “wing-it” during the planning stage like you always do because the trail will be “clear enough”…
Only to regret the few hours you spent going in circles trying to find your way back.
Have you ever wondered what you would do if you had gotten injured while you were out hiking?
What about lost and injured?
Surprisingly, this is a very common case…
In a sick kind of “when it rains it pours” way…
But even if you’re only lost, only injured, or only stranded, there is one tiny tool that could literally mean the difference between life and death…
And that tool is a survival whistle.
There is no reason not to have a survival whistle in your pack.
They’re small, lightweight, and take up virtually no space.
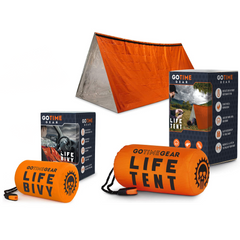
In fact, our Life Bivy emergency sleeping bag has a 120-decibel emergency whistle attached right onto the paracord drawstring! You don’t even have to think about packing an extra piece of gear.
These small life-saving tools fit almost anywhere and can bail you out if you were to get lost hiking, injured on a camping trip, stranded in your car during the winter, stuck in a natural disaster… the list goes on and on.
And when you do get lost or stranded and need to make a call for help using your survival whistle…
There is more to it than randomly blowing on it to make the loudest whistle noise and hoping someone recognizes you’re in distress.
Sure that might work, but if you want to give yourself the best opportunity to be found and rescued from your emergency situation, you need to be sure someone who hears your call for help recognizes it as such…
That’s where this post comes in.
In this post, I’m going to show you two different internationally recognized distress signals you can use to signal for help using your survival whistle.
Let’s jump in.

This one is quick and easy, and the best part…
This sound is recognized nearly anywhere in the world as a distress signal, and across all use-cases, without having to learn or remember any complicated signaling vernacular.
It’s this simple.
Three loud, short blasts on your survival whistle, each lasting approximately three seconds.
While you’re blowing, count to three in your head during each blast so it lasts approximately three seconds. Take a breath or two between each blast to give the sound time to travel through the air and catch your breath, then repeat.
Give yourself a few seconds after you’ve completed the three blast pattern, and then repeat as long as you can to give yourself the best chance of being heard.
Nearly anywhere in the world, if your three blasts caught someone’s attention, they would recognize it as a call for “help” and you dramatically increase your chances of being located and making it out alive.
Image: A.V. Club
If you’re more ambitious and can withstand longer bursts on your whistle, the SOS call is another internationally recognized call for help you can make with your survival whistle.
The SOS signal is based on Morse Code and indicates you’re facing extreme distress. So what’s the code?
Well, visually in Morse Code it looks like three dots, three dashes, and three more dots.

Translating Morse Code to your survival whistle, the dots translate to short, sharp bursts approximately one second long, and the dashes to longer bursts approximately three seconds long.
I’ll be honest, letting out blasts three seconds long is a bit of a challenge, especially when you're making a loud whistle.
But you need to persist and continue repeating the signal SOS whistle as long as you can when you’re in need. Keep in mind that the more you repeat the sound, the higher the chance of someone locating you in the vast outdoors.
If you don’t have a survival whistle in your bug out bag, day hiking pack, glove box, and generally as part of your EDC, I’d recommend adding one…
They’re small, nearly weightless, and you can easily attach them to almost anything such as your keychain or even just toss one in your pack alongside your flashlight, compass, and other tools.
If you’re ever facing distress and need to signal for help, don’t think you’ll just rely on your voice…
Your voice won’t carry nearly as far and will quickly get lost in the wind or dampened if you’re stuck in a densely forested area.
A good survival whistle is specifically designed to send out a blast for help that can be heard as far as a mile away so when you’re really in need…
You give yourself the best chance possible to survive.
And to ensure you know how to call for help using your whistle…
I put this post together so that no matter where you are in the world, you can utilize your whistle to capture the attention of someone and signal you’re in distress.
Have you ever used your survival whistle or seen a story of someone who has? How were they rescued? I’d love to hear about it in the comments.
Go Time Gear offers a wide selection of survival products from emergency sleeping bags, medical kits, Sol emergency blanket, flashlights, masks, food bar, water filter, emergency whistle and many more.
You will never know when catastrophes come, it’s best to be prepared at all times. Check out what survival products you missed today!
Go Time Gear® stands behind everything we sell. We want to be a part of preparing you and your family which means ensuring you have confidence in every product you’re counting on when you need it. If anything in your purchase fails to meet your expectations, you can return it for a replacement or refund within 30 days. We’re confident you will love the products from Go Time Gear® and we’re willing to back it up. To process a refund, visit our support page.
Go Time Gear® uses the latest security standards and encryption technology to ensure we maintain your trust and safety when we are responsible for any of your personal information. In fact, our encryption standards are the same level that large banks use to keep your information secure. From annual on-site assessments ensuring the proper infrastructure is in place, risk management analyses and procedures, cutting edge network security, and card holder data protections in place, everything is routinely monitored and tested to ensure you have a safe and secure shopping experience.
Forget about dealing with complicated shipping policies, minimum orders, or excluded products. When you shop with Go Time Gear®, you get free U.S. standard shipping on your entire order. Every time.
No minimums. No hassles. Just free shipping.